
Installing Linux for Beginners
A Beginner's Guide to Installing the Linux Operating System as an Alternative to Microsoft Windows 11
How to Install Linux on an Old Computer
A Step-by-Step Guide for the Nervous Beginner
By Bea Groves-McDaniel and SAL-9000
August 2026
Why?
Microsoft Windows 11 has been the most controversial version of Windows ever released. The reason is simple: because Microsoft assumed that you, the consumer, would buy computer hardware that fulfilled their requirements as to the performance and facilities Windows 11 needed. In the process, a great number of laptops, desktop computers (and others) that were perfectly adequate machines for day-to-day use were consigned to the scrap heap as 'inadequate' to the demands of Windows 11.
Of course, corporate users could cope with this. But the average punter out there, using their machine to watch YouTube videos, wrangle and argue on Facebook, download porn, or just chat to their folks and friends, found themselves at a loss. Stay with insecure and rapidly dating Windows 10, or buy a new computer?
Is it surprising this caused confusion? Is it surprising that the signs were that a lot of perfectly functional computers were going to end up in landfill for no logical reason? Is it surprising that a LOT of people were feeling excluded and left behind?
This guide tries to put that right. Linux is a sophisticated, powerful, and ABSOLUTELY FREE computer operating system (just like Windows) that you can install on older computers. Most people are scared of doing that. That's why Sal and I wrote this guide.
Some notes:
- You WILL erase all data on your computer if you follow this guide! BACK UP anything that's important before you begin.
- I have chosen Linux Mint as a good version to install, as it is easy to use, looks a lot like Windows, and has a VERY large free software catalogue for you to use once it's installed.
- There is a VERY large amount of Linux help out there on the Internet. Go ask!
- I can help. Email me and Sal at info@bgmcd.org
- As I say at the end: I can't be liable for any data loss caused by following this guide!
Before You Start: What You Need
Installing Linux is not difficult — but it does require a little preparation. Please read through this entire guide once before you begin. Make sure you have everything you need before you start. Go slowly, step by step, and do not skip steps.
What this guide covers
This guide explains how to install Linux Mint Cinnamon 2026 (the latest version) on a computer that:
- Uses an Intel or AMD processor (the two most common types). If your computer is NOT an Apple machine or a Chromebook, then you're generally fine.
- Is less than ten years old
- Has at least 4 GB of RAM (8 GB is better)
- Has a hard drive (HDD) or solid-state drive (SSD) of at least 80 GB
- Is running Windows 10, or an older version of Linux — or no operating system at all
Apple Mac and Chromebook computers are a separate case and are not covered here.
⚠️ IMPORTANT: You Will Lose Everything
Installing Linux will erase everything on the computer's internal drive. All your files, programs, photos, documents, emails, and anything else saved on the machine will be permanently deleted.
Before you do anything else: if there is anything on this computer that you want to keep, back it up now. Copy it to an external hard drive, a USB stick, or upload it to a cloud service such as Google Drive, OneDrive, or Dropbox. Do not skip this step.
When you are absolutely certain you have backed up everything important, proceed.
The Tools You Need
You need two things before you begin:
- A blank USB stick of at least 8 GB — This is sometimes called a "flash drive" or "memory stick." It must be at least 8 gigabytes in size. All the data on this USB stick will be erased, so use one that is currently empty or that you are happy to wipe.
- A second computer (desktop or laptop) that is currently working — You need this to download the Linux files and to create the USB installation stick. This should not be the same computer you are installing Linux on. This second computer must be able to run Windows, macOS, or Linux. Your second computer might be a friend's machine. Ask nicely! If in doubt, contact me.
Step 1: Download Linux Mint
On your second computer (the one you are using as a helper), open a web browser (Chrome, Firefox, Edge, or whatever) and go to the Linux Mint website:
👉 https://www.linuxmint.com/download.php
You will see several download options. Choose Linux Mint 22.1 "Cinnamon" and download the 64-bit ISO file. This is the file that contains everything needed to install Linux Mint. It is about 2–3 GB in size, so the download may take a while depending on your local internet speed. Make a note of WHERE it has been saved!
Note: The ISO file is a single large file that contains the entire operating system. You do not need to unzip or extract it — you will use it as-is to create the USB stick.
Step 2: Download the USB Creation Tool (Balena Etcher)
Now you need a program that will copy the Linux Mint ISO file onto your USB stick in the correct way. We recommend Balena Etcher because it is free, simple, and works on both Windows and macOS.
Go to:
👉 https://www.balena.io/etcher
Click the Download button and install Balena Etcher on your second computer.
Step 3: Create the Bootable USB Stick
This step will erase your USB stick, so make sure it does not contain any files you want to keep.
- Insert your blank USB stick (at least 8 GB) into your second computer USB port.
- Open Balena Etcher.
- Click the button labelled "Flash from file" and select the Linux Mint ISO file you downloaded in Step 1. You remember where you saved it, don't you?
- Click the button labelled "Select target" and choose your inserted USB stick from the list of drives. In most cases there will be only one option. But check CAREFULLY. If in doubt, contact me.
- Click "Flash!" and wait. Balena Etcher will copy the Linux Mint files to the USB stick. This may take several minutes. Do not remove the USB stick while it is working.
- When Balena Etcher says "Flash Complete!", safely eject the USB stick by right-clicking on it in File Explorer (Windows) or the Finder (macOS) and selecting "Eject" or "Safely Remove." Then remove the USB stick.
Your USB stick is now a Linux installation stick. You can use it to install Linux Mint on any compatible computer.
Step 4: Prepare the Computer You Want to Install Linux On
Before you plug the USB stick into the target computer (the machine that will receive Linux), you need to do one thing on that machine: disable Secure Boot.
What is Secure Boot? Secure Boot is a feature in modern computers (particularly those running Windows 11) that only allows the computer to start operating systems that are digitally signed and approved by the computer's manufacturer. Linux Mint is a perfectly legitimate operating system, but some computers with Secure Boot enabled may refuse to start it.
Disabling Secure Boot is not dangerous. It simply allows your computer to start Linux Mint from the USB stick. Here is how to do it:
- Fully shut down the target computer (not restart — shut down completely).
- Press the computer's power button to turn it on.
- As the computer is starting, watch the screen carefully. You are looking for a message that says something like "Press [Key] to enter Setup" or "Press [Key] for Boot Menu." The [key] varies depending on your computer manufacturer. Common keys are: F2, F10, F12, Esc, or Delete
- If you are not sure which key to press, search online for "[Your Computer Brand] how to enter BIOS" (for example: "Dell how to enter BIOS"). Common brands are Dell, HP, Lenovo, Acer, Asus.
- Once you are in the BIOS or UEFI setup screen, look for a menu called "Boot" or "Security."
- Find the option labelled "Secure Boot" and set it to "Disabled."
- Save your changes and exit. This is usually done by pressing F10 and confirming "Yes" to save and exit.
Note: If you cannot find Secure Boot, or if the screen looks confusing, do not panic. Many modern computers will boot Linux Mint without any changes to Secure Boot. Try Step 5 first. If the computer refuses to start from the USB stick, come back to this step.
Step 5: Boot From the USB Stick
- With the target computer shut down, insert the Linux Mint USB stick into any USB port on the machine.
- Press the power button to turn the computer on.
- As the computer starts, press the Boot Menu key (the same key you used in Step 4 — F2, F10, F12, Esc, etc.) to open the temporary boot menu.
- In the boot menu, use the arrow keys to select your USB stick. It may be labelled something like "USB-HDD", "Kingston", "SanDisk", or the name of your USB brand. Select it and press Enter.
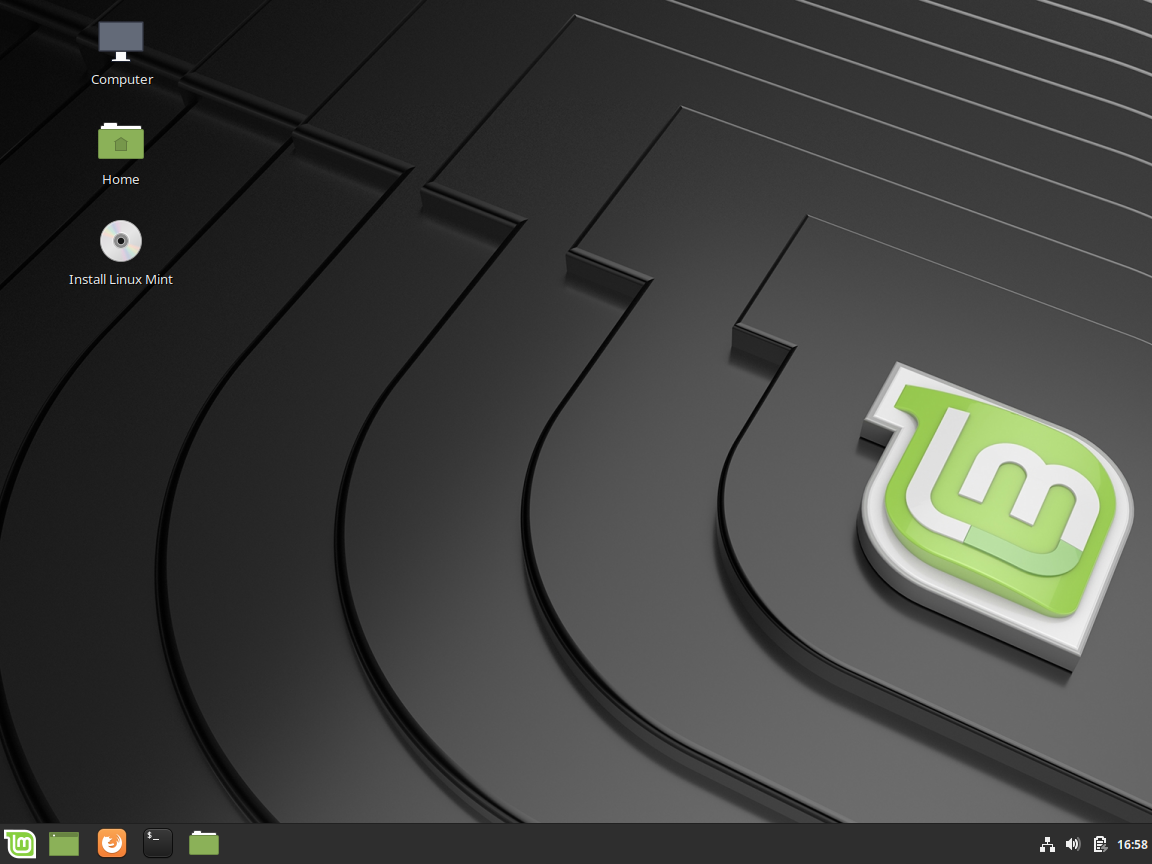
The computer should now start from the USB stick and you will see the Linux Mint desktop appear on screen. This is called "trying Linux Mint without installing" — nothing on your hard drive will be changed yet. You are running Linux Mint directly from the USB stick, so it may be slightly slower than normal. Take this opportunity to have a look around and make sure everything works (sound, Wi-Fi, screen resolution).
Troubleshooting: If the computer starts normally into Windows instead of showing Linux Mint, the computer did not boot from the USB. Go back to Step 4 and make sure Secure Boot is disabled, and double-check that you selected the correct device in the boot menu.
Step 6: Install Linux Mint
Once you are satisfied that Linux Mint is running correctly from the USB stick, it is time to install it properly onto the hard drive. Double-click the icon on the desktop labelled "Install Linux Mint."
The Installation Wizard will open. Follow the steps carefully:
Step 6a: Language
Choose your language from the list on the left. English (UK or US) is probably what you want. Click Continue.
Step 6b: Keyboard Layout
Choose the keyboard layout you use. Most UK users should select "English (UK)" and most US users should select "English (US)." If you are unsure, the wizard usually guesses correctly by default. Click Continue.
Step 6c: Multimedia Codecs
Tick the box labelled "Install third-party software for graphics and Wi-Fi hardware, Flash, MP3 and other media." This installs drivers and codecs that allow Linux to play videos, music, and connect to Wi-Fi networks properly. Click Continue.
Step 6d: Installation Type
This is the most important screen. You will see several options:
- "Erase disk and install Linux Mint" — This is the simplest option. It will automatically erase the entire hard drive and install Linux Mint. Use this if you are sure you have backed up everything and want a clean installation.
- "Something else" — This is for advanced users who want to manually control how the hard drive is partitioned. Do not choose this unless you know what you are doing.
- "Encrypt the new Linux Mint installation" — This adds encryption for security. Recommended only if you have a strong reason to encrypt.
- "Use LVM with the new Linux Mint installation" — This is a more flexible way of managing disk space. Useful for power users; optional for beginners.
For most people, choose "Erase disk and install Linux Mint" and click Install Now. A warning will appear telling you that the changes will be written to disk. Click Continue to confirm.
Step 6e: Where Are You?
Select your time zone from the map or the dropdown list. Click Continue.
Step 6f: Who Are You?
Fill in the following fields:
- Your name — Your full name (e.g., "Bea Groves-McDaniel")
- Your computer's name — A short name for this computer (e.g., "bea-linux" or "office-pc")
- Pick a username — A short name for your user account (e.g., "beagmcd"). This is what you will type to log in. Use lowercase letters and numbers only, no spaces.
- Choose a password — Choose a strong password and enter it twice to confirm. Write this down and keep it somewhere safe — you will need it to log in and to make changes to the system.
You will also see two tick boxes:
- "Log in automatically" — If you tick this, Linux will start directly to the desktop without asking for a password. Convenient but less secure, especially for laptops. Recommended only for a desktop computer that no one else can access.
- "Require my password to log in" — The opposite of the above. More secure. Recommended for laptops and shared computers.
Choose the option that suits you and click Continue.
Linux Mint will now begin installing. This typically takes 10 to 20 minutes. The installation wizard will show you some slides about Linux Mint's features while it works. When it is finished, click "Restart Now."
Step 7: Remove the USB Stick
When the computer restarts, the installation wizard will prompt you to remove the USB stick. Remove it immediately and press Enter. The computer will now boot into Linux Mint for the first time.
Step 8: Welcome to Linux Mint!
Congratulations! You are now running Linux Mint. The first thing you should do is:
Update the system
Linux Mint will check for updates automatically. If it does not, open the Update Manager (the shield icon in the bottom-left corner of the screen) and install any available updates. Keeping your system updated is important for security and stability.
Connect to the Internet
Click the network icon in the bottom-right corner of the screen to connect to your Wi-Fi network or wired Ethernet connection.
Install programs
Linux Mint comes with a program called "Software Manager" that lets you browse and install thousands of free programs with a single click. Open it and explore. You will find replacements for most Windows programs you are familiar with:
| Windows program | Linux Mint alternative | How to find it |
|---|---|---|
| Microsoft Word | LibreOffice Writer | In Software Manager, search "LibreOffice" |
| Microsoft Excel | LibreOffice Calc | In Software Manager, search "LibreOffice" |
| Microsoft PowerPoint | LibreOffice Impress | In Software Manager, search "LibreOffice" |
| Internet Explorer / Edge | Firefox or Chrome | Pre-installed |
| Outlook | Thunderbird | In Software Manager, search "Thunderbird" |
| Photoshop | GIMP | In Software Manager, search "GIMP" |
| Spotify | Spotify | In Software Manager, search "Spotify" |
| Zoom | Zoom or Jitsi Meet | In Software Manager, search "Jitsi" |
| Windows Media Player | VLC Media Player | Pre-installed |
Glossary of Computer Jargon
BIOS (Basic Input/Output System) — The built-in program that controls how a computer starts up. Modern computers use UEFI instead, which does the same job but in a more modern way.
Boot / Booting — The process of a computer starting up and loading its operating system. "Booting from USB" means starting the computer using the programs on the USB stick instead of the hard drive.
Codec — A program that encodes or decodes digital data such as video or audio. Linux needs certain codecs to play MP3 music files, Netflix videos, or other media.
Distribution (Distro) — A version of Linux. Linux comes in many different flavours made by different organisations. Linux Mint is one of the most popular and beginner-friendly distributions. Others include Ubuntu, Fedora, and Debian.
Ethernet — A wired connection to the internet, using a cable that plugs into a port on the computer (looks like a wide telephone plug).
Flash / Flashing — The technical term for copying an ISO file to a USB stick in the correct way.
Hard Drive / HDD — The main storage device in a computer where files, programs, and the operating system are stored. SSDs (solid-state drives) do the same job but are faster and have no moving parts.
ISO File — A single large file that contains everything needed to install an operating system. Think of it as a digital photograph of a DVD.
LVM (Logical Volume Manager) — An advanced way of organising a hard drive that makes it easier to resize partitions later. Useful for power users; not necessary for beginners.
Operating System — The fundamental software that runs a computer and manages all other programs. Windows, macOS, and Linux are all operating systems.
Partition / Partitioning — Splitting a hard drive into separate sections, each treated by the computer as its own drive (e.g., C: drive, D: drive). When you install Linux, it creates its own partitions.
RAM (Random Access Memory) — The computer's working memory. Programs run from RAM. More RAM means the computer can run more programs at once without slowing down. 4 GB is the minimum for Linux Mint; 8 GB is comfortable.
Secure Boot — A security feature in modern computers that only allows the computer to start approved operating systems. It sometimes needs to be disabled to allow Linux to boot from USB.
SSD (Solid-State Drive) — A faster type of hard drive with no moving parts. Linux runs very well on SSDs and they make a huge difference to speed compared to older HDD drives.
UEFI (Unified Extensible Firmware Interface) — The modern replacement for BIOS. Does the same job but is more sophisticated. On most computers made after 2012, you will interact with UEFI rather than BIOS when you press the startup key.
USB (Universal Serial Bus) — A type of connection port found on all modern computers. USB sticks (also called flash drives or memory sticks) plug into these ports.
Wi-Fi — A wireless connection to the internet.
Useful Links
Official Linux Mint Resources
- Linux Mint Official Website: https://www.linuxmint.com
- Linux Mint Download Page: https://www.linuxmint.com/download.php
- Linux Mint User Guide: https://linuxmint-user-guide.readthedocs.io/
- Linux Mint Forums: https://forums.linuxmint.com/ — A friendly community where you can ask questions if you get stuck.
Tools
- Balena Etcher (for creating bootable USB): https://www.balena.io/etcher
Video Guides
- Linux Mint Official YouTube Channel: https://www.youtube.com/@linuxmint — Official installation and overview videos.
- Learn Linux TV (YouTube): https://www.youtube.com/@LearnLinuxTV — Excellent beginner-friendly Linux tutorials, including a full Linux Mint installation walkthrough.
- DistroWatch.com: https://distrowatch.com/ — News and reviews of Linux distributions.
Switching from Windows
- Linux Mint for Windows Users: https://linuxmint.com/documentation.php — Official documentation, including a guide for Windows switchers.
- LibreOffice (free office suite, replaces Microsoft Office): https://www.libreoffice.org — Pre-installed with Linux Mint.
- Mozilla Firefox (browser): https://www.mozilla.org/en-US/firefox/ — Pre-installed with Linux Mint.
- Thunderbird (email client): https://www.thunderbird.net — Available in the Software Manager.
Getting Help
- Linux Mint Forums: https://forums.linuxmint.com/
- Bea Groves-McDaniel (the author of this guide): info@bgmcd.org
- Reddit r/linuxquestions: https://www.reddit.com/r/linuxquestions/ — A friendly place to ask specific questions.
Health Warning — Please Read Carefully
IMPORTANT: This guide is provided for informational purposes only. Bea Groves-McDaniel and SAL-9000 cannot accept any responsibility for any loss, damage, or inconvenience that may result from following this guide or from attempting to install Linux on your computer.
Every computer is different. Some computers have hardware or firmware configurations that may make the installation process more complex or that may prevent Linux from installing or running correctly. If you are unsure about any aspect of the installation process, or if your computer is used for business or mission-critical purposes, we strongly recommend that you consult a qualified computer technician before proceeding.
Always back up your important files before performing any operation that modifies your computer.
This guide was correct at the time of writing (August 2026). Software changes over time, and the screens and options described here may differ slightly from the latest version of Linux Mint. The general principles and steps will remain the same.
This guide was written to accompany a workshop on breathing new life into old computers. It is part of a series of guides on digital inclusion, sustainability, and making the most of the technology we already have.
If this guide has been useful to you, please consider sharing it with others who might benefit from it.